Let’s continue with Mikroelektronika Clicks.
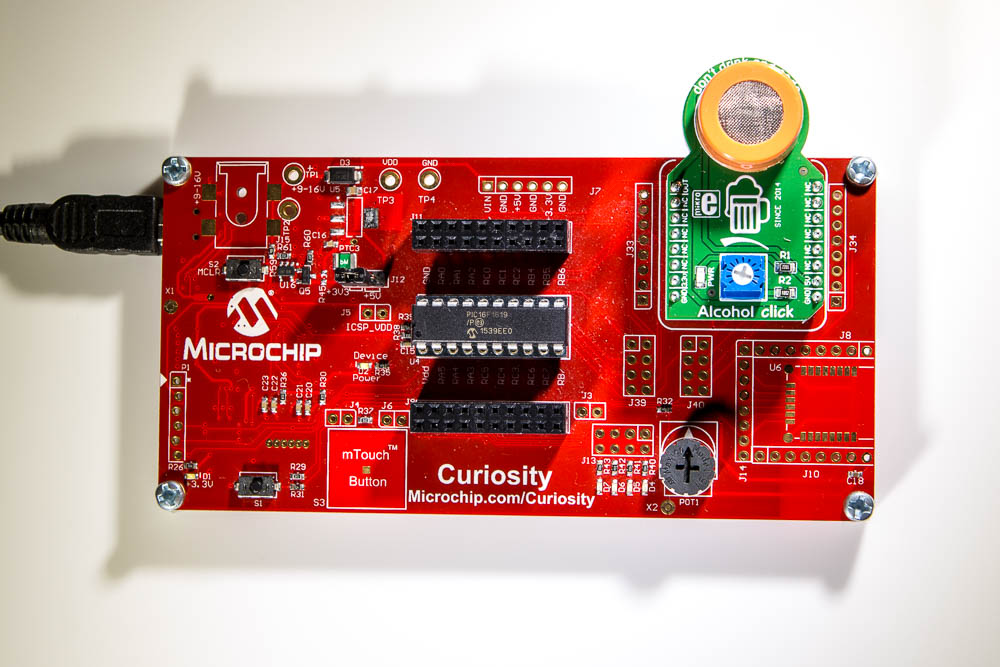
This time we will be using Alcohol click.
Plug Alcohol click into Curiosity board and connect it to you USB port.
Open MPLAB X IDE, and go to File -> New Project.
– Microchip Embedded; Standalone Project
– Family: Mid-Range 8-bit MCUs (PIC10/12/16/MCP); Device: PIC16F1619
– Supported Debug Header: None
– Select Tools: Microchip Starter Kit -> Curiosity
– Select Compiler: XC8 (v…)
– Project name Alcohol1619
– Finish
– Click on MCC button
– Change Internal Clock to 8MHz
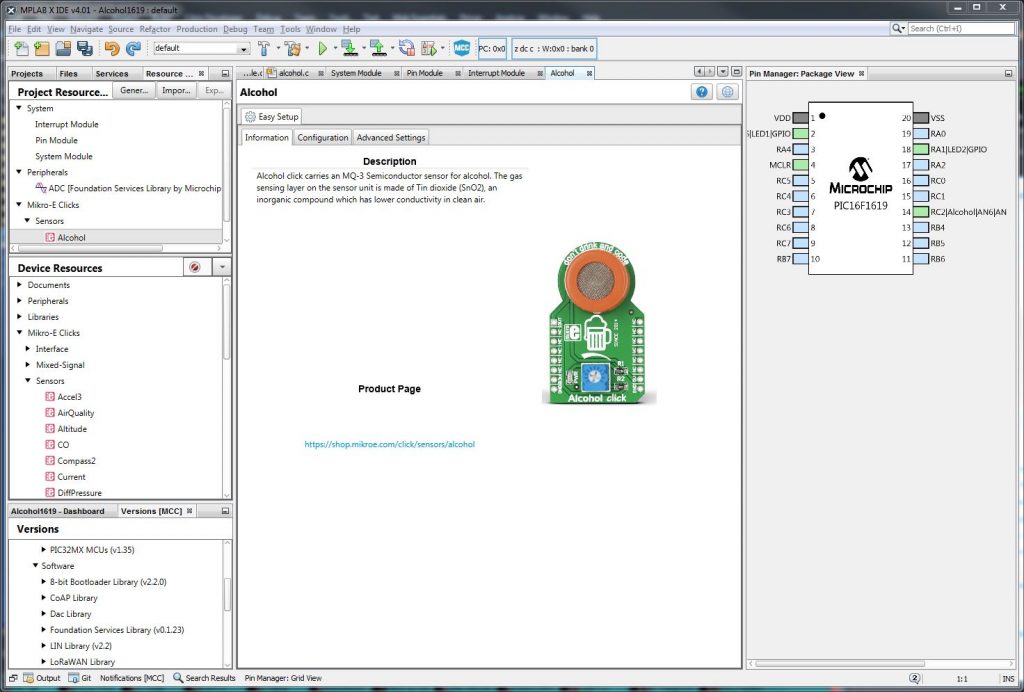
– On the left side go to Device Resources -> expand Mikro-E Clicks -> expand Sensors and double click on Alcohol
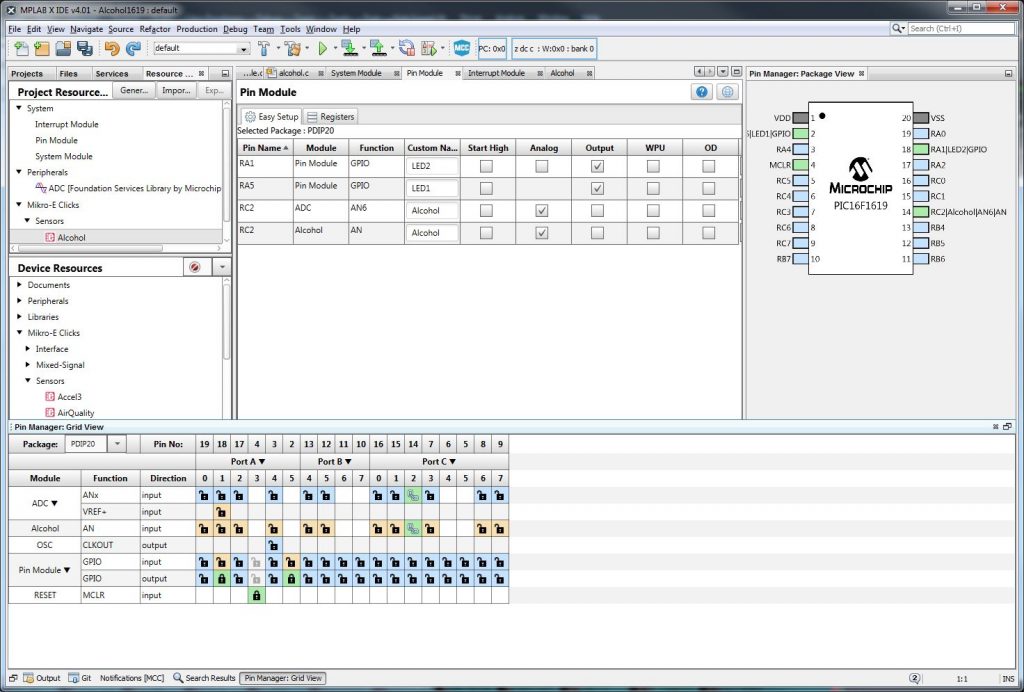
– Open ‘Pin Manager: Grid View’ and switch package to PDIP20
Now we need to figure out how to configure pins.
This sensor is simple analog sensor, so all we need is configure ADC.
If you look at the pinout diagram for click boards page you will that analog in pin 1:
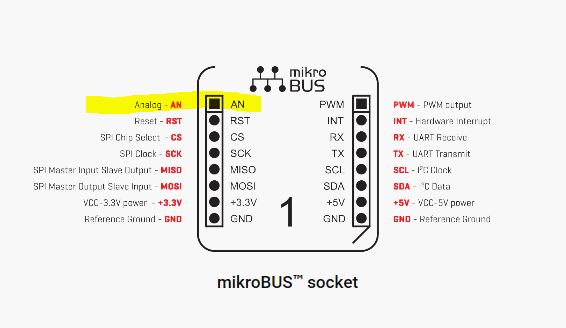
Now we need to know how they match on Curiosity board, so let’s open Curiosity Development Board Schematic and we will see:

that we need to connect:
Alcohol AN -> RC2 (please not that it’s automatically linked to ADC module on the same pin)
Let’s also add an LED
GPIO output -> RA5
GPIO output -> RA1
– After that click on Generate button
– Go back to Projects page -> Source Files and open main.c
– replace the empty while(1) loop inside main function with:
float BAC = ALCOHOL_GetBACLevel();
        float PPM = ALCOHOL_GetPPM();

        LED1_LAT = BAC > 0.02 ? HIGH : LOW;
        LED2_LAT = PPM > 5 ? HIGH : LOW;

        __delay_ms(250);
We are done!!!
Click on Make and Program Device Main Project, no LED should be on.
No take a sip of your favorite Whiskey (I would recommend this one) and blow a light breath into the sensor you should be LED lights up.