Continuous Integration (CI) is a practice in software development when it’s encouraged to submit your code to the main repository very often – up to several times a day. Thus everyone the code is tested continuously and everyone is working with the latest code, which simplify merging.
Continuous Integration usually is implemented with Continuous Deployment (CI/CD).
Essential part of CI is test automation – as soon as you submit your code into source control an event will trigger testing. The most popular framework to implement CI is Jenkins. It’s open and free. There are literally thousands of plug-ins which make it extremely customizable.
So let’s try continuous integration in practice. Got to Jenkins download page and download Jenkins for your platform. Follow installations instructions for default installation (include all recommended plug-ins)
Once you done with the installations you will see Welcome screen:

Let’s create our first job.
Click on ‘create new job’, or ‘New Item’ on the left –
item name: test; select ‘Freestyle project’; click OK –
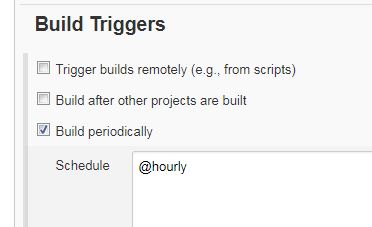
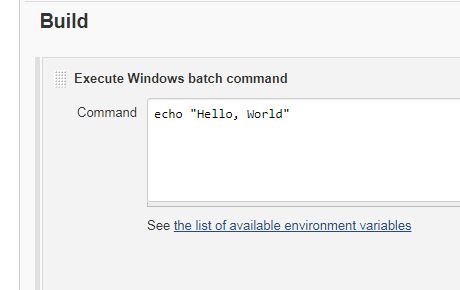
scroll to Build Triggers, check Build periodically, in the Schedule box type @hourly; scroll to Build, click Add build step, select Windows batch command, in the Command box type echo “Hello, World”; click Save. (if you are on Linux platform select Execute shell).
Your new job (project) is saved and scheduled be executed once an hour. You don’t control exact time – Jenkins will balance all your jobs. But we don’t have to wait, we can trigger the job manually – click on Build Now on the left side. After brief pause new job should appear below in Build History section. If everything was configured correctly it will be marked with a blue circle:
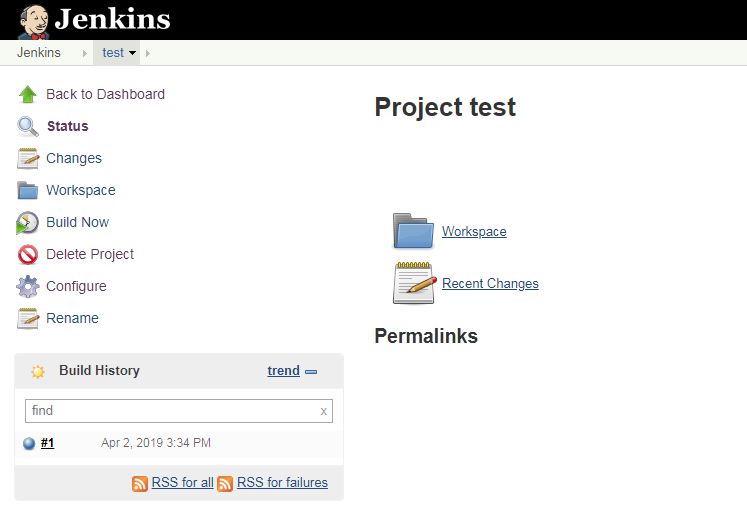
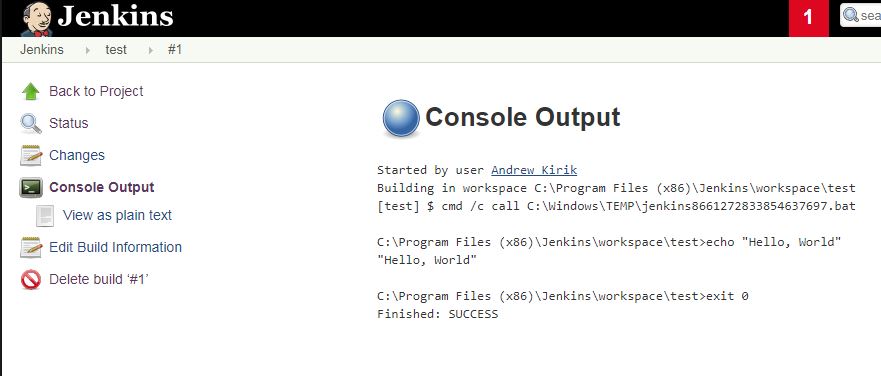
You can click on it and see actual console output (if you click on build number, and don’t see output, click on Console Output on the left):
Now let’s create more realistic project, with a source code integration and unit test automation.
But first we have to do some preparations. Clone test project I created based on my JUnit post. (If you need instructions see my git posts.).
What you want is to have your own GitHub repository with this source code. Easiest way is to delete .git folder from the downloaded project and initialize your own git project (you again can follow my previous git post). Then you need to upload new git project to your GitHub repo. Save the URL once your are done.
Now lets go back to Jenkins. Go back to Jenkins start page (click on the gentleman in the corner), click on New Item –
item name java-junit-jenkins, select Freestyle project, click OK –
in the General section check GitHub project and copy URL you just copied;
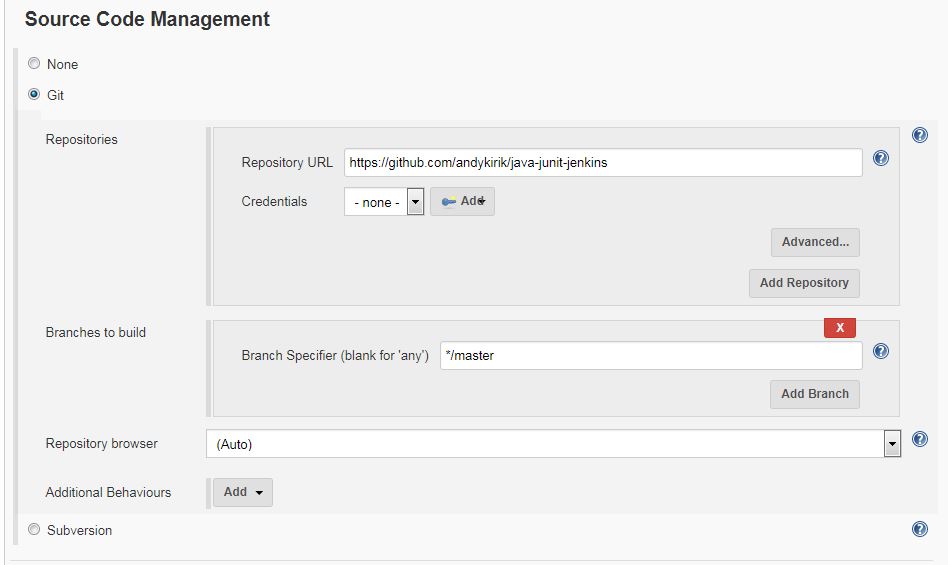
in Source Code Management section check Git, again type the URL;
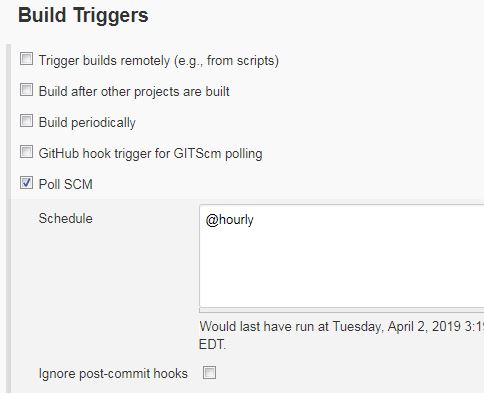
in Build Triggers section check Poll SCM, type @hourly in Schedule box;
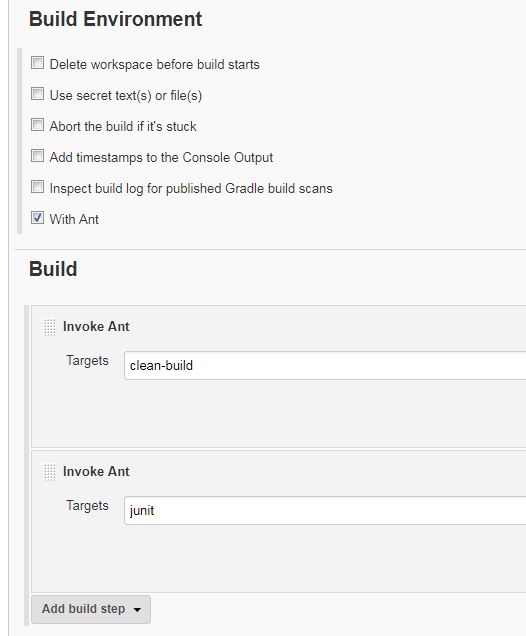
in Build Environment check With Ant
in Build section click Add build step, select Invoke Ant and type clean-build in Target box, then click on Add build step again, select Invoke Ant and type junit in Target box; click Save

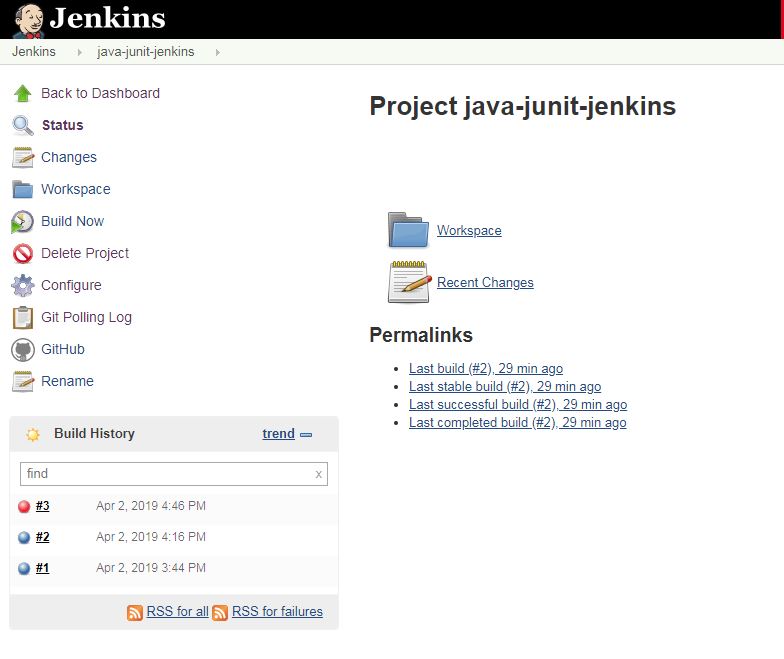
Once again we can start new job manually – click Build Now on the left and momentarily new build should appear in the Build History section.
Click on the blue circle (but if you mistyped something it would be red) and we can see all the steps:
Started by user Andrew Kirik
Building in workspace C:\Program Files (x86)\Jenkins\workspace\java-junit-jenkins
No credentials specified
 > git.exe rev-parse --is-inside-work-tree # timeout=10
Fetching changes from the remote Git repository
 > git.exe config remote.origin.url https://github.com/andykirik/java-junit-jenkins # timeout=10
Fetching upstream changes from https://github.com/andykirik/java-junit-jenkins
 > git.exe --version # timeout=10
 > git.exe fetch --tags --progress https://github.com/andykirik/java-junit-jenkins +refs/heads/*:refs/remotes/origin/*
 > git.exe rev-parse "refs/remotes/origin/master^{commit}" # timeout=10
 > git.exe rev-parse "refs/remotes/origin/origin/master^{commit}" # timeout=10
Checking out Revision 3e3171e545b107738c8d636695b4c94596beb9c1 (refs/remotes/origin/master)
 > git.exe config core.sparsecheckout # timeout=10
 > git.exe checkout -f 3e3171e545b107738c8d636695b4c94596beb9c1
Commit message: "fix error"
First time build. Skipping changelog.
[java-junit-jenkins] $ cmd.exe /C "ant.bat clean-build && exit %%ERRORLEVEL%%"
Buildfile: C:\Program Files (x86)\Jenkins\workspace\java-junit-jenkins\build.xml

clean:
   [delete] Deleting directory C:\Program Files (x86)\Jenkins\workspace\java-junit-jenkins\out
   [delete] Deleting directory C:\Program Files (x86)\Jenkins\workspace\java-junit-jenkins\classes
   [delete] Deleting directory C:\Program Files (x86)\Jenkins\workspace\java-junit-jenkins\unit_report

compile:
    [mkdir] Created dir: C:\Program Files (x86)\Jenkins\workspace\java-junit-jenkins\classes
    [javac] C:\Program Files (x86)\Jenkins\workspace\java-junit-jenkins\build.xml:24: warning: 'includeantruntime' was not set, defaulting to build.sysclasspath=last; set to false for repeatable builds
    [javac] Compiling 6 source files to C:\Program Files (x86)\Jenkins\workspace\java-junit-jenkins\classes

jar:
    [mkdir] Created dir: C:\Program Files (x86)\Jenkins\workspace\java-junit-jenkins\out
      [jar] Building jar: C:\Program Files (x86)\Jenkins\workspace\java-junit-jenkins\out\HelloWorld.jar

clean-build:

BUILD SUCCESSFUL
Total time: 0 seconds
[java-junit-jenkins] $ cmd.exe /C "ant.bat junit && exit %%ERRORLEVEL%%"
Buildfile: C:\Program Files (x86)\Jenkins\workspace\java-junit-jenkins\build.xml

junit:
    [mkdir] Created dir: C:\Program Files (x86)\Jenkins\workspace\java-junit-jenkins\unit_report
    [junit] Running tests.HelloWorldTest
    [junit] Tests run: 1, Failures: 0, Errors: 0, Skipped: 0, Time elapsed: 0.04 sec
    [junit] Running tests.StrUtilsTest
    [junit] Tests run: 1, Failures: 0, Errors: 0, Skipped: 0, Time elapsed: 0.04 sec
    [junit] Running tests.UtilsTest
    [junit] Tests run: 2, Failures: 0, Errors: 0, Skipped: 0, Time elapsed: 0.054 sec

BUILD SUCCESSFUL
Total time: 1 second
Finished: SUCCESS
Hopefully you get same results.
Now you can sit and relax. Once an hour Jenkins will check GitHub for the new changes, you can check status if you click on Git Polling Log:
Started on Apr 2, 2019 4:19:00 PM
Using strategy: Default
[poll] Last Built Revision: Revision 3e3171e545b107738c8d636695b4c94596beb9c1 (refs/remotes/origin/master)
No credentials specified
 > git.exe --version # timeout=10
 > git.exe ls-remote -h https://github.com/andykirik/java-junit-jenkins # timeout=10
Found 1 remote heads on https://github.com/andykirik/java-junit-jenkins
[poll] Latest remote head revision on refs/heads/master is: 3e3171e545b107738c8d636695b4c94596beb9c1 - already built by 2
Done. Took 0.39 sec
No changes
But that’s boring, let’s do some changes, let’s break something.
Open file …\java-junit-jenkins\src\ak\utils\Utils.java and in the function abs remote minus sign:
	public static int abs(int x)
        {
                return x > 0 ? x : x;
        }
Save the file and submit changes to GitHub (git add, git commit, git push… 🙂
We can wait another hour, or we can trigger the job manually (Build Now), let’s do it. It’s red!!! What’s the problem???
Click on the red button:
junit:
    [mkdir] Created dir: C:\Program Files (x86)\Jenkins\workspace\java-junit-jenkins\unit_report
    [junit] Running tests.HelloWorldTest
    [junit] Tests run: 1, Failures: 0, Errors: 0, Skipped: 0, Time elapsed: 0.04 sec
    [junit] Running tests.StrUtilsTest
    [junit] Tests run: 1, Failures: 0, Errors: 0, Skipped: 0, Time elapsed: 0.04 sec
    [junit] Running tests.UtilsTest
    [junit] Tests run: 2, Failures: 1, Errors: 0, Skipped: 0, Time elapsed: 0.035 sec
    [junit] Test tests.UtilsTest FAILED

BUILD FAILED
C:\Program Files (x86)\Jenkins\workspace\java-junit-jenkins\build.xml:56: Test failure detected, check test results.

Total time: 0 seconds
Build step 'Invoke Ant' marked build as failure
Finished: FAILURE
As you can see Unit Test failed and as a result build failed as well.
Fix and commit your code. To finish testing I would recommend wait this time. You can spend it by reading further material:
(As an Amazon Associate I earn from qualifying purchases)
And soon you should see another build in Build History – blue this time.
We are done with our integration in Continuous Integration and Jenkins!