Now that we know how to use at Microchip Code Configurator let’s explore it full potential.
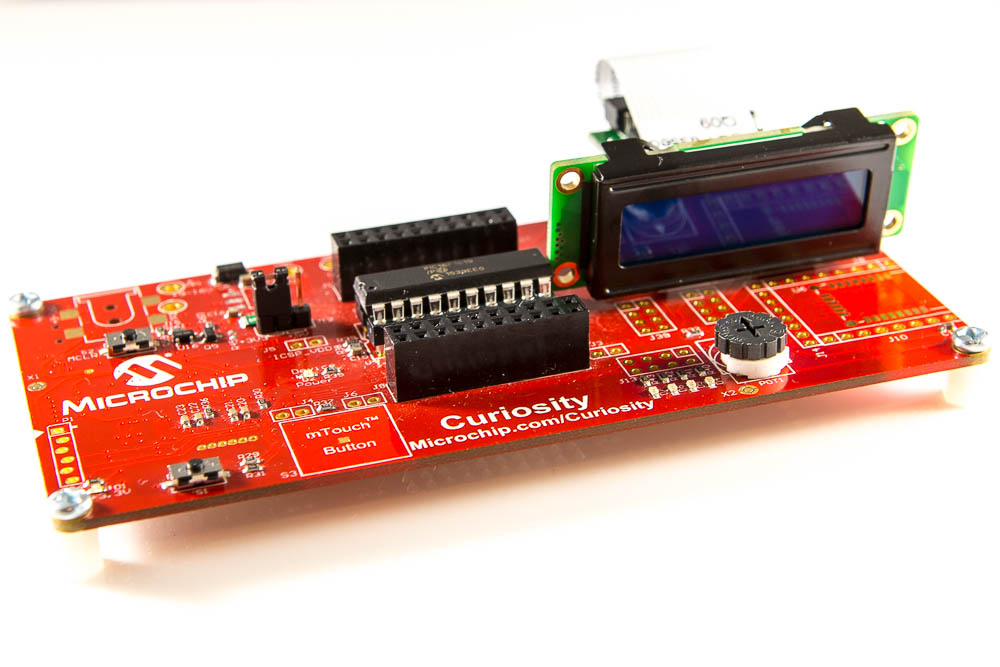
Microchip Curiosity boards support mikroBUS socket. Let’s see how we can use it. As a first test we will use LCD mini click.
Plug LCD click board into Curiosity board and connect all to you USB port.
Open MPLAB X IDE, and go to File -> New Project.
– Microchip Embedded; Standalone Project
– Family: Mid-Range 8-bit MCUs (PIC10/12/16/MCP); Device: PIC16F1619
– Supported Debug Header: None
– Select Tools: Microchip Starter Kit -> Curiosity
– Select Compiler: XC8 (v…)
– Project name LCD1619
– Finish
– Click on MCC button
– Change Internal Clock to 8MHz
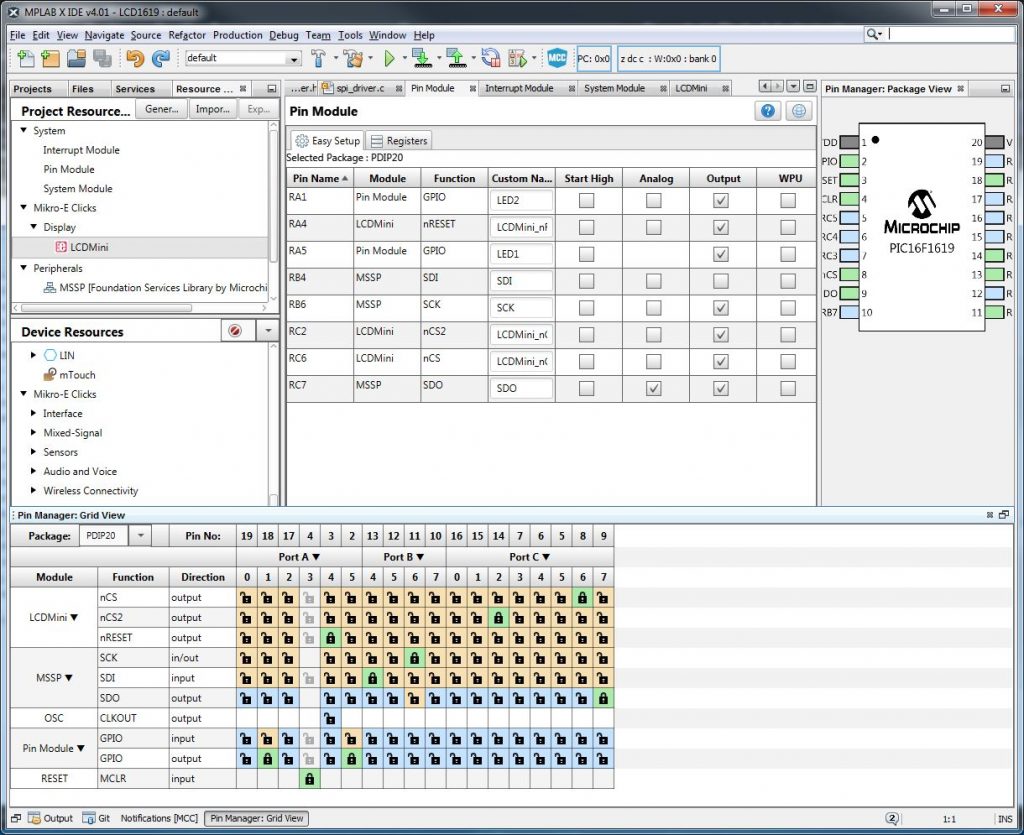
– On the left side go to Device Resources -> expand Mikro-E Clicks -> expand Display and double click on LDCMini

– Open ‘Pin Manager: Grid View’ and switch package to PDIP20
Now we need to figure out how to configure pins.
Description for LDC says: “It communicates with the target microcontroller over SPI interface and the following pins on the mikroBUS™ line: PWM, INT, RST, AN“. So we need to enable those pins.
If you look at the pinout diagram on LCD mini click page you will see those pins:
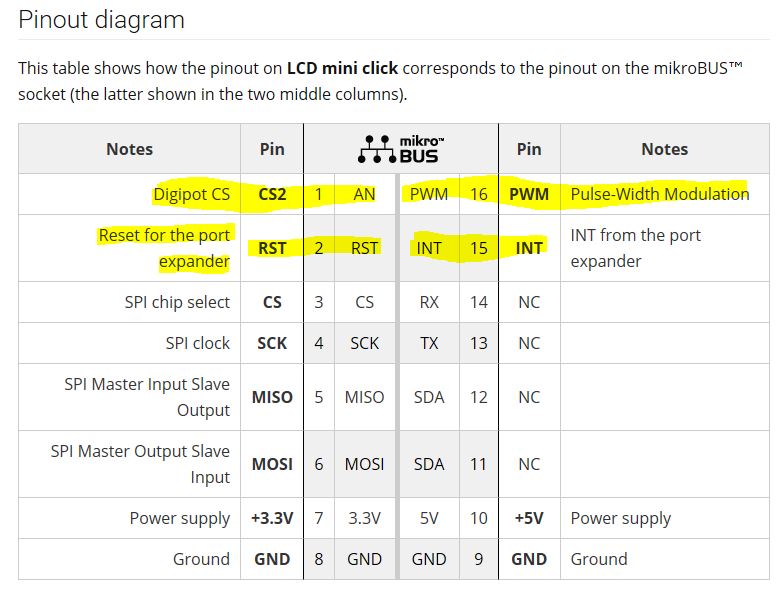 .
.
Now we need to know how they match on Curiosity board, so let’s open Curiosity Development Board Schematic and we will see:
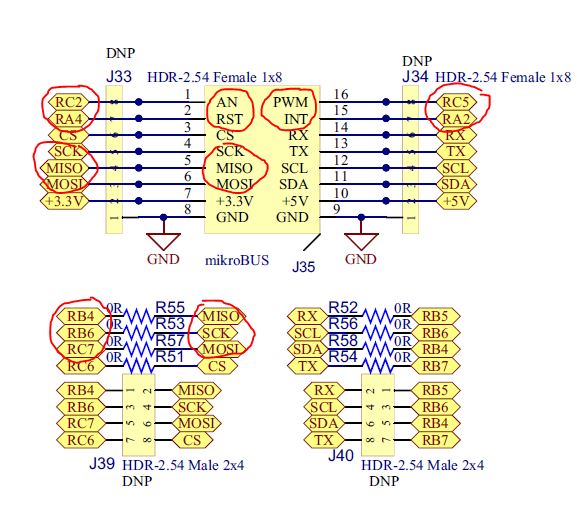
that we need to connect:
LDCMini nCS -> RC6
LDCMini nCS2 -> RC2
LDCMini nRESET -> RA4
PIC MSSP SCK -> RB6
PIC MSSP SDI -> RB4 (PIC is a master so it’s MISO)
PIC MSSP SDO -> RC7 (PIC is a master so it’s MOSI)
– After that click on Generate button
– Go back to Projects page -> Source Files and open main.c
– Add following code right before main function:
static void lcd_writeString(uint8_t row, const char* string, const uint8_t strLen)
{
    lcd_setAddr(row, 0);
    for (uint8_t i = 0; i < strLen; ++i) {
        if (string[i]) {
            lcd_writeChar(string[i]);
        }
    }
    lcd_returnHome();
}
- replace the empty while(1) loop inside main function with:
lcd_setContrast(0x20);
    while (1) {
        char line1[16] = "-- Jump Start --";
        lcd_writeString(0, line1, 16);
        char line2[16] = "   Programming  ";
        lcd_writeString(1, line2, 16);
    }
We are done!!!
Click on Make and Program Device Main Project, and you should see our hello message.